

Dealing with improper shipping costs can prove quite frustrating for WooCommerce site owners. Such issues frequently result in unhappy consumers and abandoned shopping carts. Displaying proper shipping charges is critical for maintaining customer happiness.
Shipping prices for e-commerce shops are determined by a variety of factors. This covers package weight, quantity of products, and packaging dimensions. However, one of the most crucial considerations is the delivery cost dependent on distance.
WooCommerce lets you determine the cost of shipping based on the distance an order has to travel. This strategy guarantees that clients pay costs that are reasonable and correct depending on their location.
In this article, we'll walk you through the steps of setting up WooCommerce Distance Rate Shipping.
By following these steps, you can establish a more transparent and cost-effective shipping system for your business.
Key Features of the WooCommerce Distance Rate Shipping Plugin
- Shipping Rate Calculation: Set shipping rates based on distance or travel time for flexible delivery options.
- Multi-Location Inventory Management: Manage inventory across multiple locations for efficient shipping.
- Custom Shipping Regulations: Tailor shipping rules based on product dimensions and distances.
- Weight-based rules: Adjust shipping costs according to product weight for specific prices.
- Google Distance Matrix API Integration: Use the Google Distance Matrix API for accurate distance and duration calculations.
- Multi-Location Delivery: Facilitate delivery from multiple locations to optimize shipping.
- Rule Management Options: Create, edit, enable, disable, or delete shipping rules for complete control.
- Support for kilometers and miles: Calculate shipping charges in kilometers or miles for different prices.
- Comprehensive Rule Setup: Set up multiple rules based on different values and categories.
- No monthly fees: Use the plugin without any monthly subscription costs.
Who Can Benefit From WooCommerce Distance Rate Shipping?
Not every store needs to calculate shipping rates based on distance or travel time, but many businesses can take advantage of this feature. It is especially beneficial for online stores that handle their deliveries instead of relying on couriers like FedEx or UPS. This approach is ideal for local delivery and stores that need to offer specific shipping rates to customers.
Configure The Distance Rate Shipping for WooCommerce
Method 1: Installing via WordPress Dashboard
1. Log in to your WordPress admin area:
Navigate to the left column and find "Plugins".
Click on "Plugins".

2. Add a new plugin:
In the Plugins section, click the "Add New" button located at the top of the page.
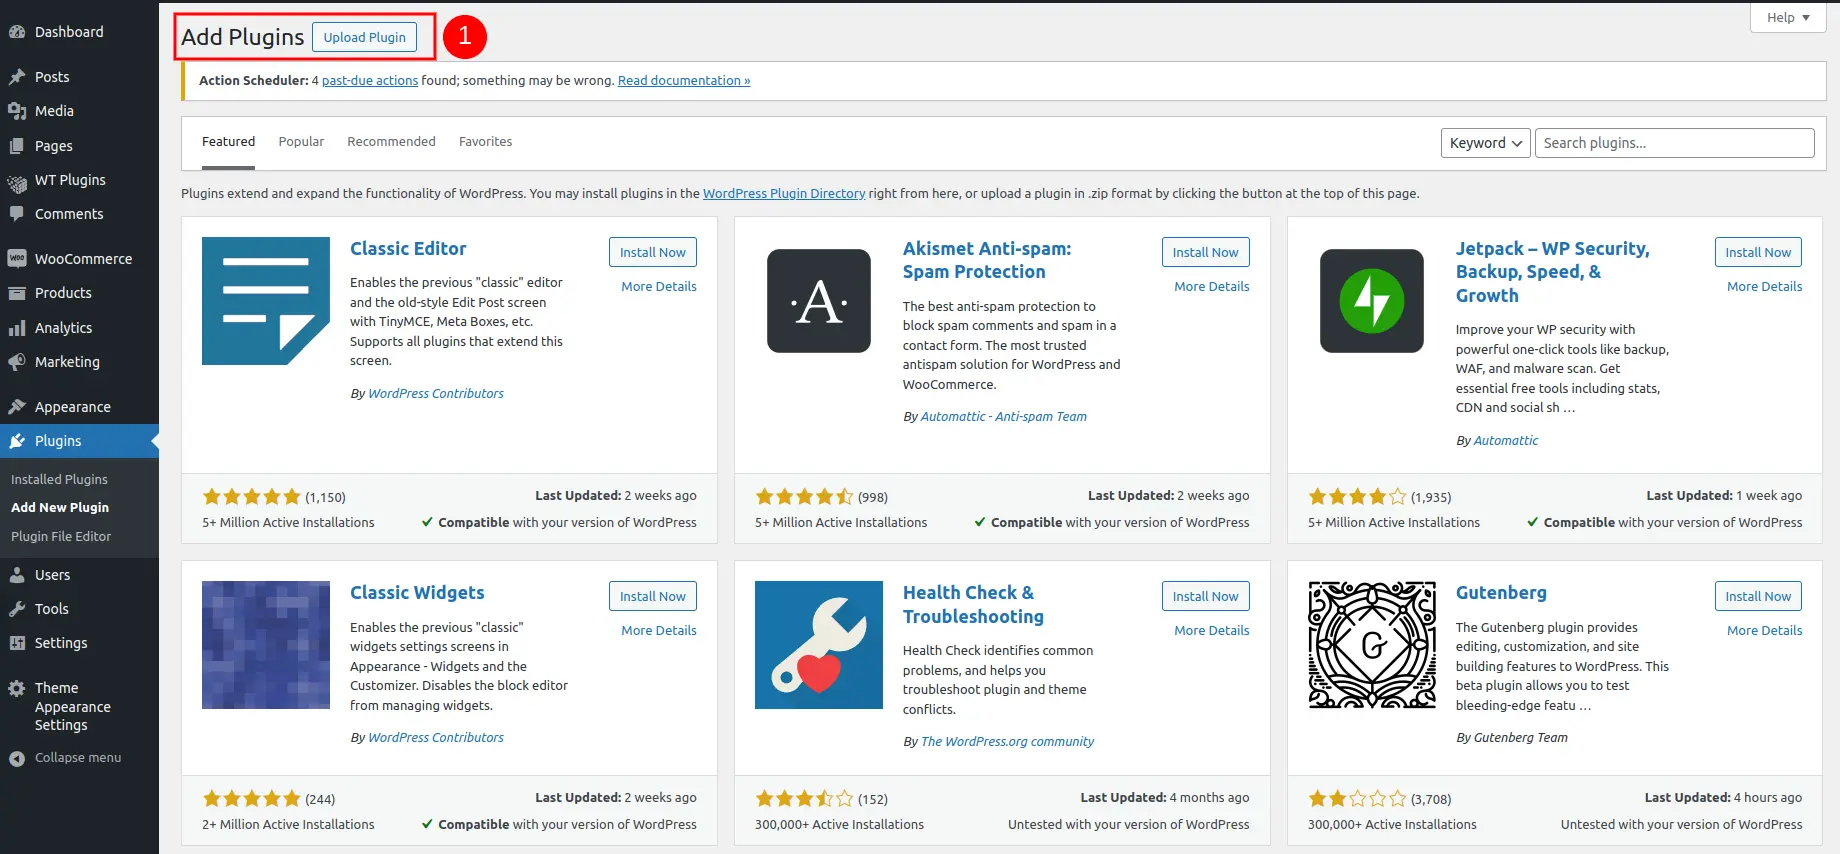
3. Upload the plugin:
Click the "Upload Plugin" button.
4. Install the plugin:
You will see an option to upload a file from your computer. Select the wt-woocommerce-distance-rate-shipping.zip file you downloaded from wordpress.org.
Click on "Install Now".

5. Activate the plugin:
Once the plugin is uploaded, click the "Activate Plugin" link.

Your plugin is now successfully installed and activated.
Method 2: Installing via FTP
1. Extract the plugin zip file:
Unzip the file you downloaded from CodeCanyon to your computer.
2. Upload the plugin:
Use an FTP client to upload the extracted folder to the wp-content/plugins directory on your server.
3. Activate the plugin:
Go to the Plugins menu in your WordPress admin area.
Find the newly uploaded plugin and click "Activate".

Woo Product Fast Delivery Cost Admin Settings
1. Accessing plugin options
Go to the plugin's options page in your WordPress admin area.


2. Configuration options
➤Enable Fast Delivery Pricing feature:
Toggle this option to enable or disable the Quick Delivery Pricing feature on your site.
➤Find the box header title:
Set the title text for the Delivery Options box on the Product Details page.
➤Find the box header background color:
Select a background color for the header of the Delivery Options box.
➤Find box header text color:
Select a text color for the Delivery Options box header.
➤Search button text:
Specify the text for the button in the Delivery Options box.
➤Find button background color:
Choose a background color for the button.
➤Find button text color:
Select a text color for the button.
➤Delivery Options Text Layout:
Determine the layout of the text for quick distribution options.
➤Delivery cost layout for cart and checkout:
Configure the layout to display delivery costs on the cart and checkout pages.
➤Delivery Option Display Type:
Set how the delivery option is displayed on the product details page.
➤Label the first option in the drop-down:
Define a label for the first option in the Select-Type dropdown menu.
➤Collection of Changes:
Click the "Save Changes" button to apply your settings.
Also Read:-
- Best WooCommerce Product Add-Ons Plugins: In-Depth Comparison
- 10+ Best Luxury WordPress Themes Download for Free
- Best Free WooCommerce Product Filter Plugins Free Download
Woo Product Fast Delivery Price Single Product Settings

Product-specific settings
1. Shipping Tab:
Access the Shipping tab on the product page to manage delivery settings.
2. Enable Fast Delivery Pricing feature for individual products:
Enable or disable the fast delivery cost feature for specific products. Use this option if the product does not require expedited delivery.
3. Total Time:
Set the total time for delivery, such as 1 day or 10 hours.
4. Type of Time:
Select the unit for the time entered (eg hours or days).
5. Delivery Title:
Add a title for the delivery option.
6. Pin/Zip Codes:
Enter the pin or pin code where express delivery is available. Entering * will make this option available globally.
7. Price:
Enter the price for expedited delivery service.
8. Add new delivery:
Click this button to add a new delivery option for a product.
9. Delete delivery option:
Use the Delete button to remove the Delivery Option row from the Product Settings.
Woo Product Fast Delivery Price Import/Export Details

Import/Export Settings
1. Access the Shipping tab:
Find and click the Shipping tab in the Single Product Page Settings.
2. Select the Import/Export tab:
Select the Import/Export tab to manage product data.
3. Product Import and Export:
Click on the relevant option to import or export product data.
4. Import using the sample file:
Use the sample file format to import data. Select the file and click to import.
5. Export to CSV:
Click the Export button to generate and download a CSV file of the product data.
Conclusion
In summary, setting up distance rate shipping in WooCommerce can greatly improve your store's efficiency and customer satisfaction. By following these guidelines, you can easily configure your store to calculate shipping costs based on distance, ensuring fair and accurate rates for your customers.
Whether you're expanding your reach or optimizing costs, understanding distance-based shipping is key. This setup helps increase customer trust and reduce cart abandonment by offering transparent pricing.
At WebbyTemplate, we are here to support your e-commerce journey. If you have any questions, feel free to reach out. Thank you for choosing us as your WooCommerce partner!


